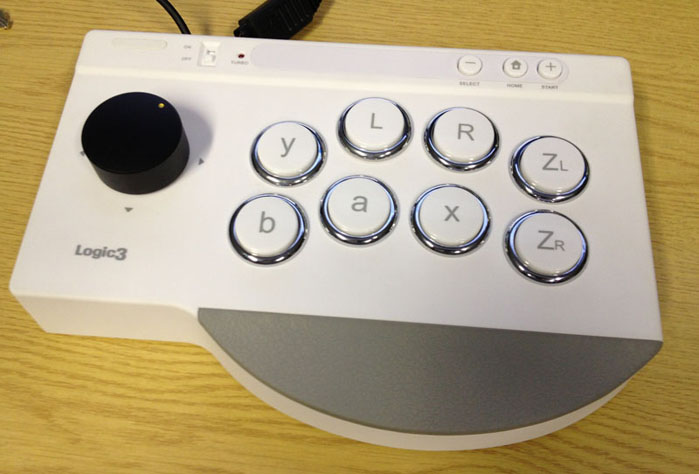
Making an Atari Jaguar Tempest Controller
At the museum we have an Atari Jaguar and the brilliant game Tempest 2000 which is an updated version of the classic 1981 arcade game from Dave Theurer.

Tempest 2000 was released in 1994 on the Atari Jaguar. Coded by the legendary Jeff Minter, the game received critical praise for its 3D graphics, soundtrack, and gameplay.
The best way to experience the game is to use a spinner like on the original arcade machine but sadly the Atari Jaguar controllers only had a D-pad. However the game did have an option to use a spin control ...
Using an inexpensive rotary encoder we set-out to modify a controller to give us that original arcade feel. But whilst this has been done many times before with an Atari Jaguar controller, we opted for something a little more arcade-like...
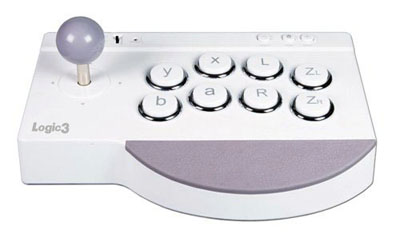
We wanted an arcade style desktop joystick and found the Logic3 Arcade Stick for the Wii cheap on eBay. It was a great candidate for a little hacking!
Okay, it is white and after a thousand grubby fingers have been all over it, it may not look it's best but we'll address that later with some spray paint perhaps ...
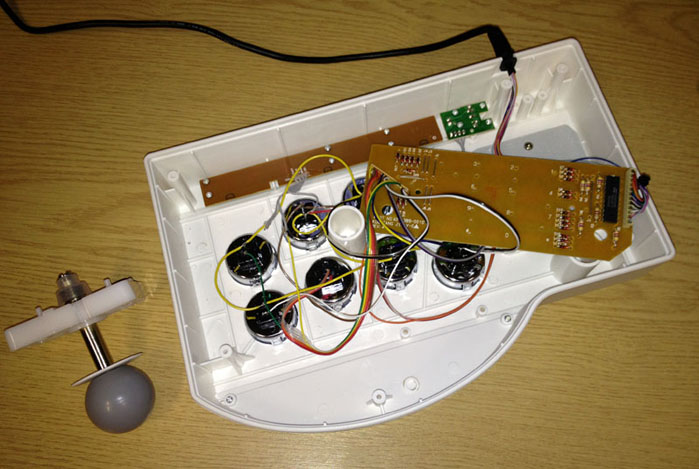
Firstly we took the joystick apart and removed the PCB, cable and joystick. We can always use the joystick on something else one day!
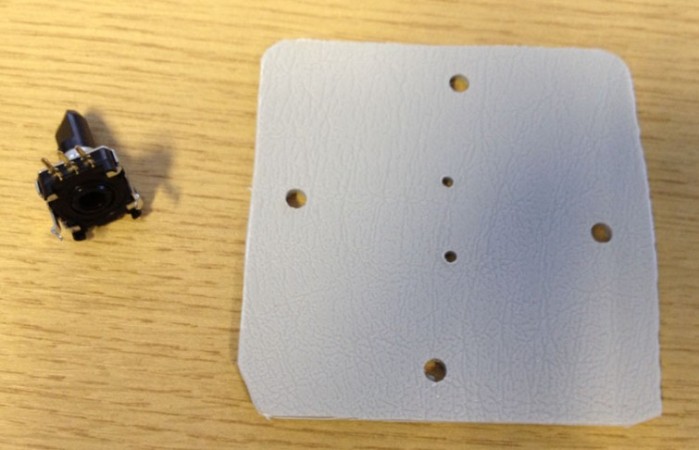
We wanted to mount the rotary encoder where the joystick was, so we needed to make a plastic plate that held the rotary encoder centrally in the hole. We hacked a piece of plastic from the side of an old plastic 2.25" floppy disk case and used the original joystick to mark out the mounting holes.
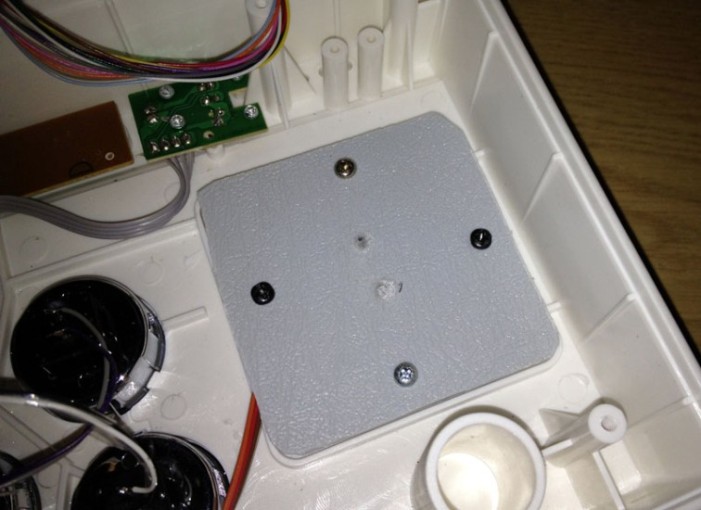
We glued the rotary encoder in place, soldered wires on to the three pins and screwed the plate to the joystick. Because we used the original joystick mount as a template, the holes lined up perfectly.
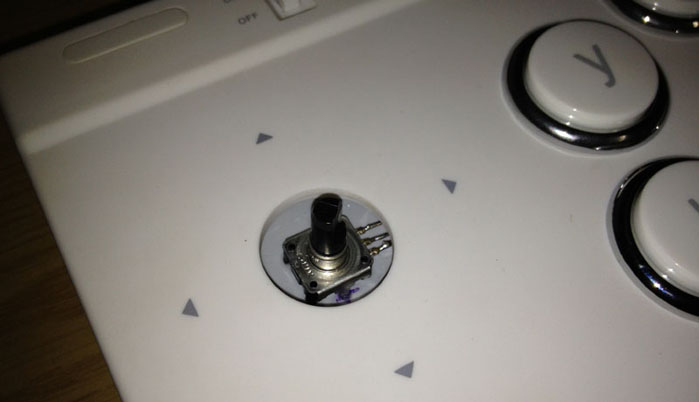
Turning the controller back over you can see the encoder is perfectly central in the original joystick hole and just the right height with the shaft protruding proud ready for the knob to be fitted. We bought a 48mm knob from CPC which is just the right size. Its a push fit onto the rotary encoder.
Then we needed to get busy with the electronics. We took apart a standard Atari Jaguar controller and removed the two PCBs. Only one of them are required so we desoldered the D-Pad and ABC button board leaving just the
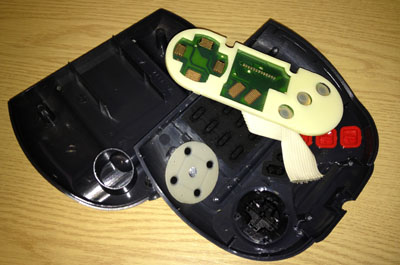
main board which has the chip on it. We had to work out the pinout of the grey flat cable as these holes would be where we connect the buttons and rotary encoder of our new controller.
The parts on the right here are not required.
We then soldered some ribbon cable to where we have desoldered the original flat grey cable and started thinking about the order of the buttons. Obviously the Wii buttons didn't exactly match the original Jaguar buttons but there is an A and B button and we used the Y button for C. L & R was used for the D-Pad left and right and Zl and Zr were used for up and down on the D-Pad.
Once the pinout of the Jaguar controller PCB was worked out, it was a simple case of wiring the switches accordingly.
The Option and Pause pins were also wired to appropriate buttons on the controller. Lastly the centre pin of the rotary encoder was wired to ground and the left and right pins of the encoder were connected to the D-Pad left and right inputs.
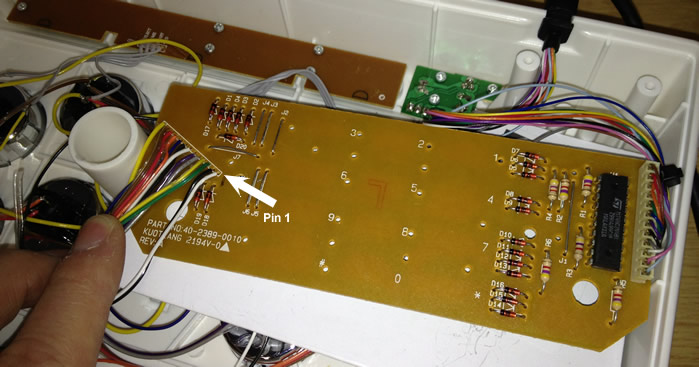
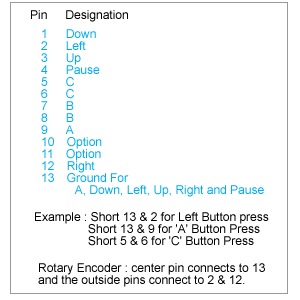
The picture above shows the wires soldered to where the original grey flat cable was. The pinout of the holes are shown here on the right.
There are many hacks online where the rotary encoder is built into the actual Tempest controller, but we wanted a more arcade feel.
You will need a second Jaguar controller plugged aswell to bring up the hidden menu for enabling the spin control option.
You need to press the PAUSE button on both controllers to bring up the hidden menu in the options menu. Alternatively you could just short pins 13 & 4 on the second controller input to fake the button press ...
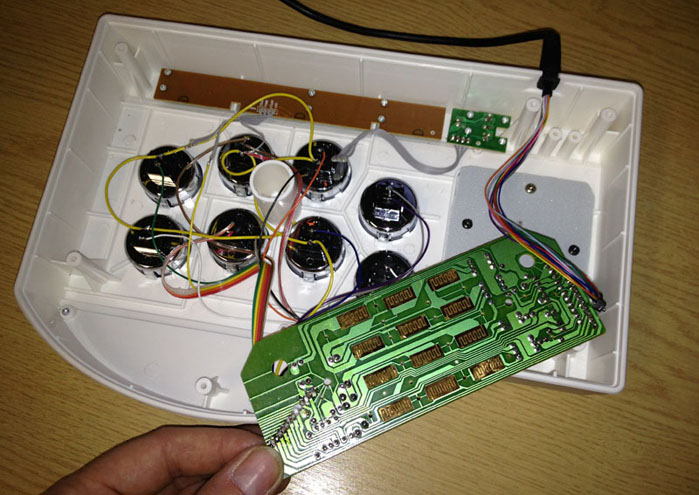
Finally it was a case of fitting the PCB in the case. It was just a simple case of putting a piece of card over the back of the switches and putting the PCB on the card. Once the base is screwed back in positive the PCB cannot move anywhere as there are plastic mounts on each side. The Jaguar strain relief on the cable fitted perfectly in the original cable hole (after a little widening with a sharp knife!)
This is the final Atari Jaguar Tempest Controller ...
And here's a video of it in action ...
 Tempest 2000 was released in 1994 on the Atari Jaguar. Coded by the legendary Jeff Minter, the game received critical praise for its 3D graphics, soundtrack, and gameplay.
 We wanted an arcade style desktop joystick and found the Logic3 Arcade Stick for the Wii cheap on eBay. It was a great candidate for a little hacking!
 main board which has the chip on it. We had to work out the pinout of the grey flat cable as these holes would be where we connect the buttons and rotary encoder of our new controller.

 The picture above shows the wires soldered to where the original grey flat cable was. The pinout of the holes are shown here on the right.
